pfSense and GreenRADIUS - Integration Guide
Before starting, make sure GreenRADIUS is configured with users imported from your LDAP and can communicate with your FortiGate
Configuring GreenRADIUS
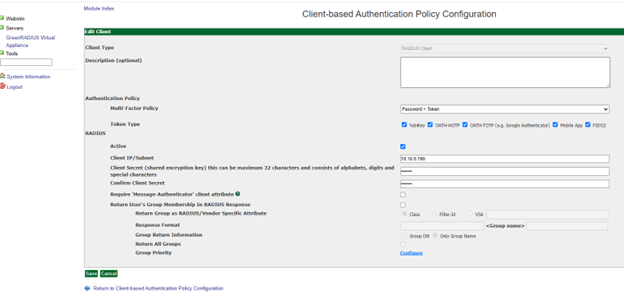
In the GreenRADIUS web admin interface, add the pfSense Server as a RADIUS client.
- Click the Global Configuration tab
- Click the Client-based Authentication Policies icon
- Enter the IP address of the pfSense Server. Then enter the same RADIUS secret twice. Then click the Add button.
Configuring the pfSense Server
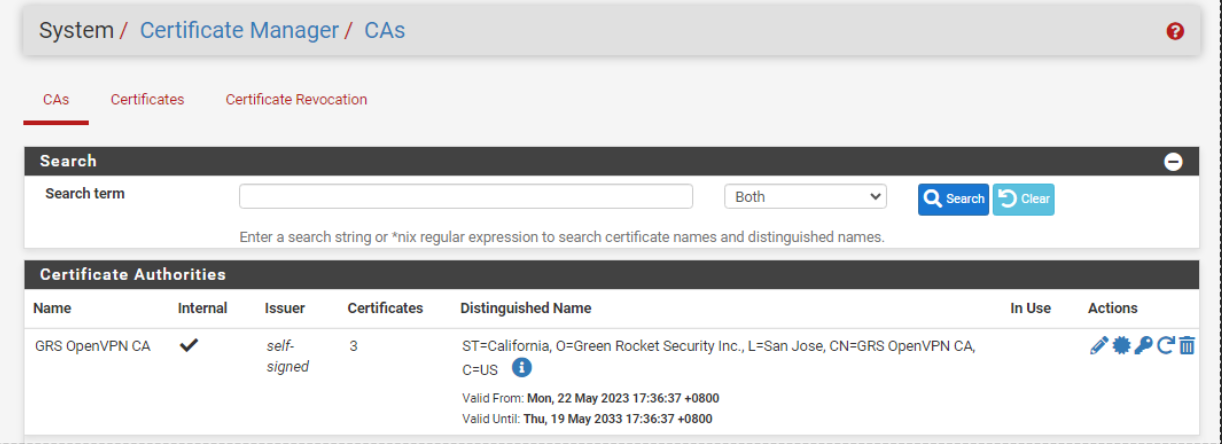
Generating the Certificate Authority (CA)
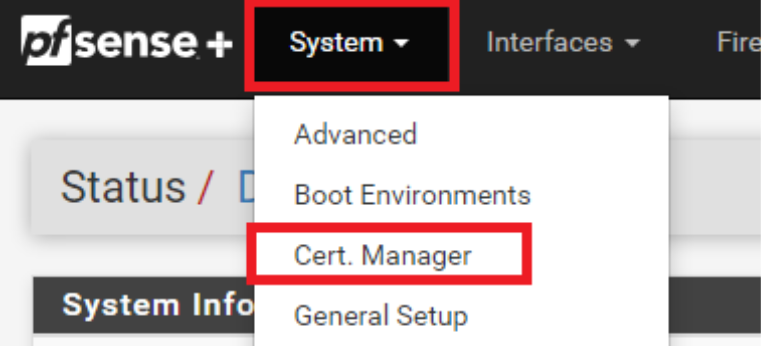
- From the menus at the top of the screen, select Systems > Cert. Manager
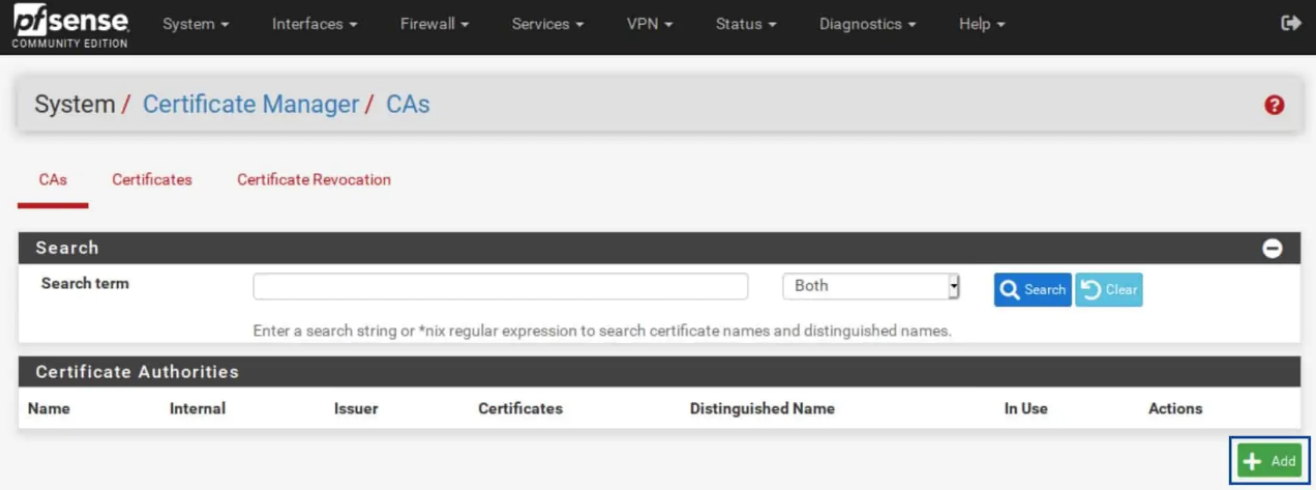
- Click the
Addbutton at the bottom right.
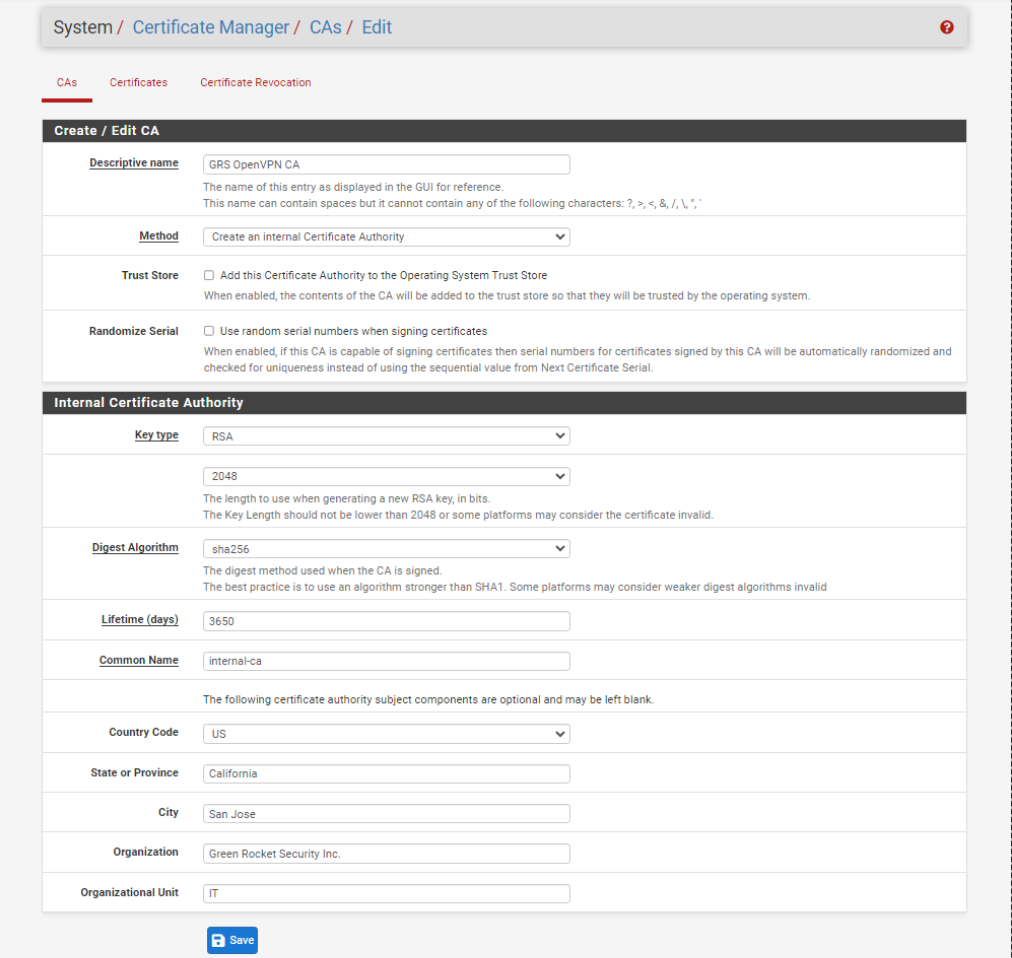
- Enter a name for your CA.
- Make sure Method is set to Creat an Internal Certificate Authority.
- Select your Key type. I will be using RSA for this example, but you can also use ECDSA.
- Set your Key length to at least 2048.
- Set your Digest Algorithm to at least sha256.
- Choose a Common Name for your certificate or leave the default of internal-ca. Then click Save.
Generating the Server Certificate
Select System > Cert. Manager. Select the Certificates sub-menu.
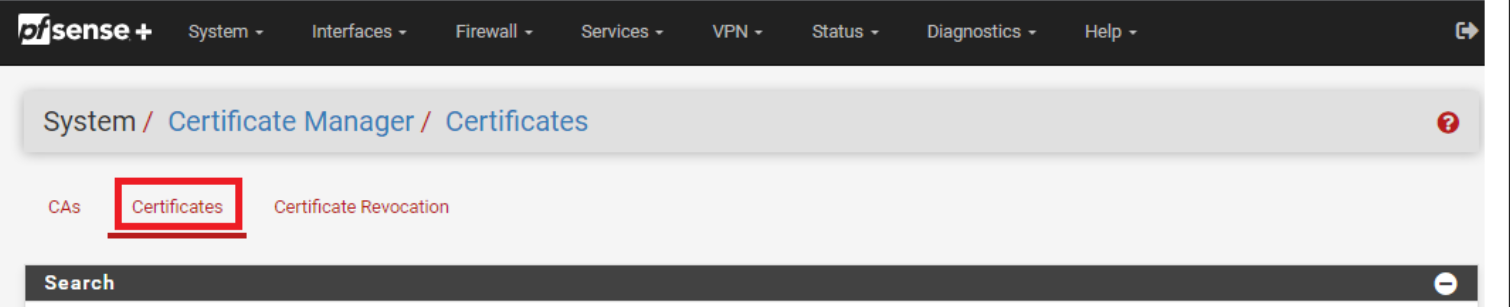
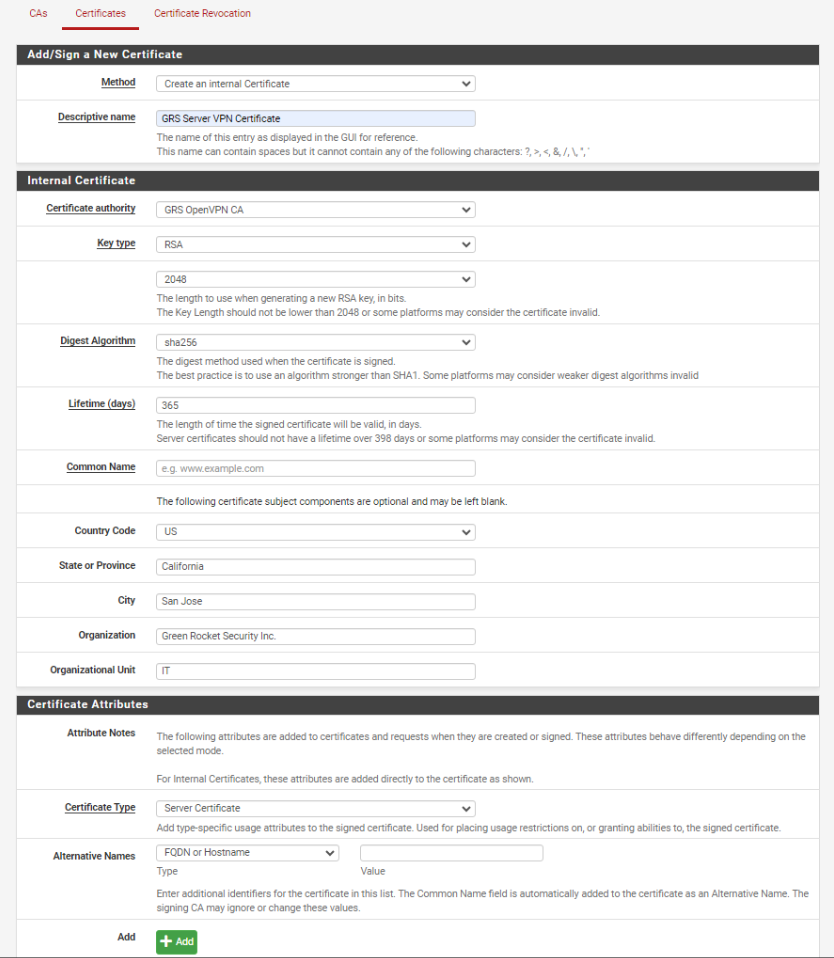
- From the Certificates sub-menu, click the Add/Sign button at the bottom right.
- Make sure Method is set to Create an Internal Certificate.
- Enter a descriptive name for your certificate.
- Use the same values you set for the Certificate Authority for the Key type and length, as well as for the Digest Algorithm.
- Set the Lifetime to 365 days.
- Set the Server Certificate as the Certificate Type.
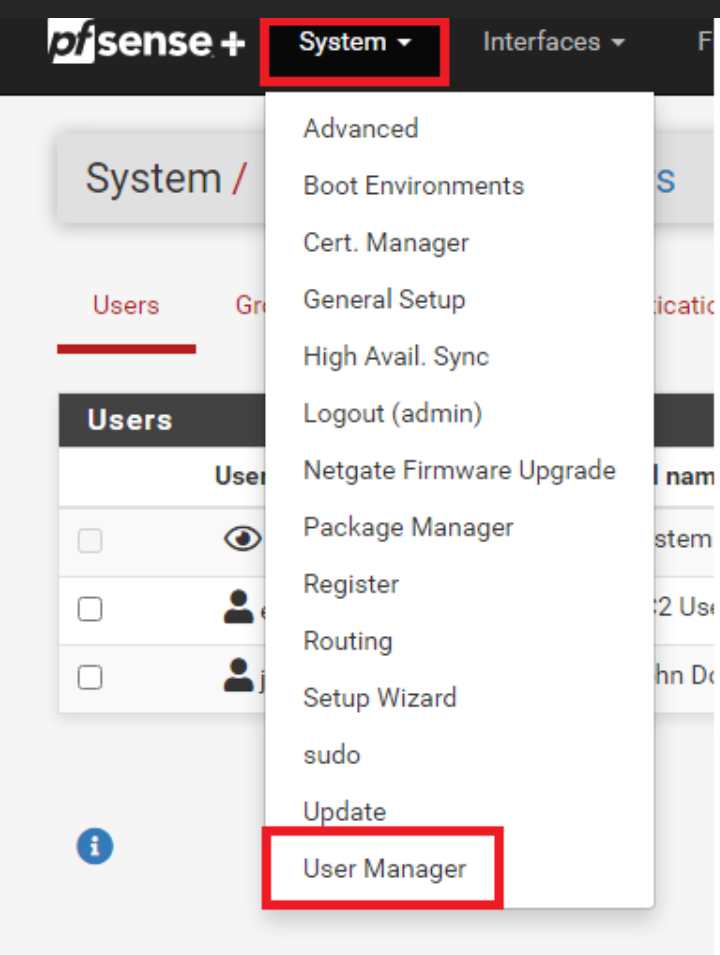
Adding GreenRADIUS as Authentication Server
- Go to System > User Manager
- Go to Authentication Servers and click Add.
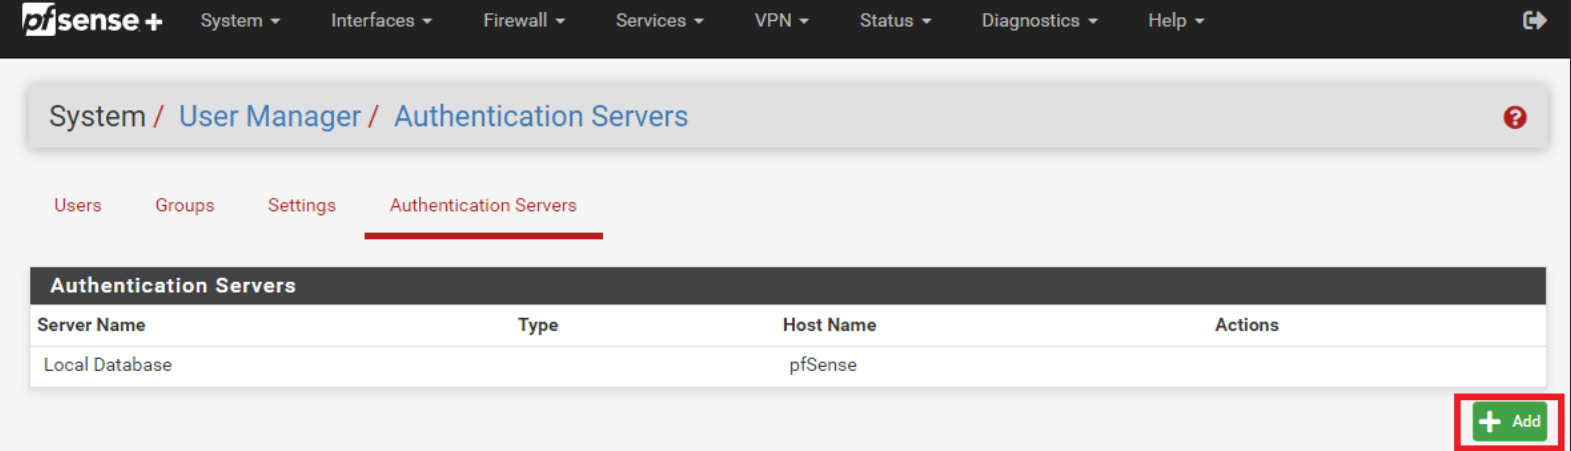
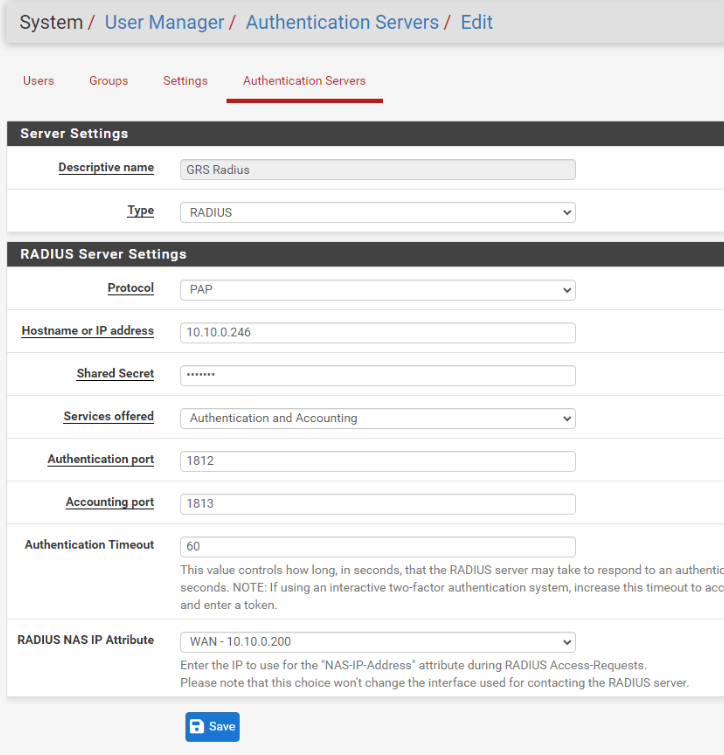
- Fill out the required details for your GreenRADIUS server.
Creating the OpenVPN Server
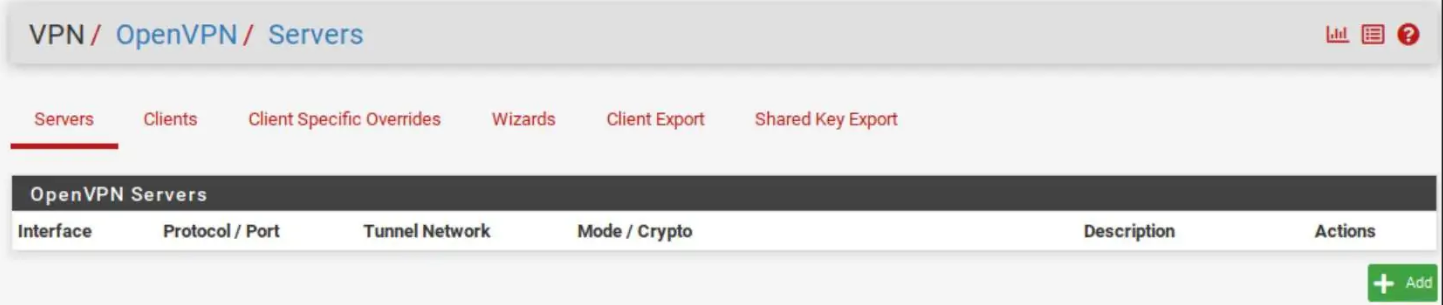
- From the menus at the top of the screen, select VPN > OpenVPN. You are taken to the OpenVPN Servers sub-menu. Then click Add.
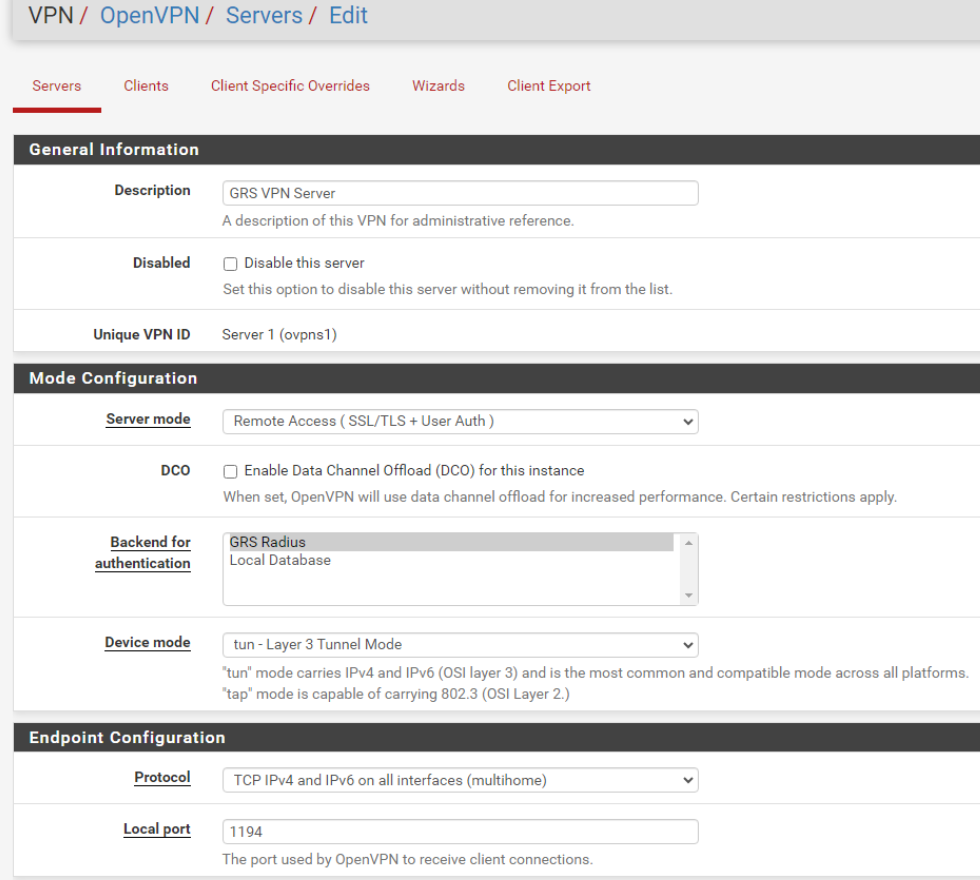
General Information
- Set the Server Mode to either Remote Access (SSL/TLS), Remote Access (User Auth), or Remote Access (SSL/TLS+User Auth). As mentioned above, I will be using Remote Access (SSL/TLS+User Auth) for this example.
- Select the GreenRADIUS Server you added as Authentication Server.
- Change the Local port to a different port if required by your network topology or leave it at the default (1194).
- Enter a name for your server in the Description field.
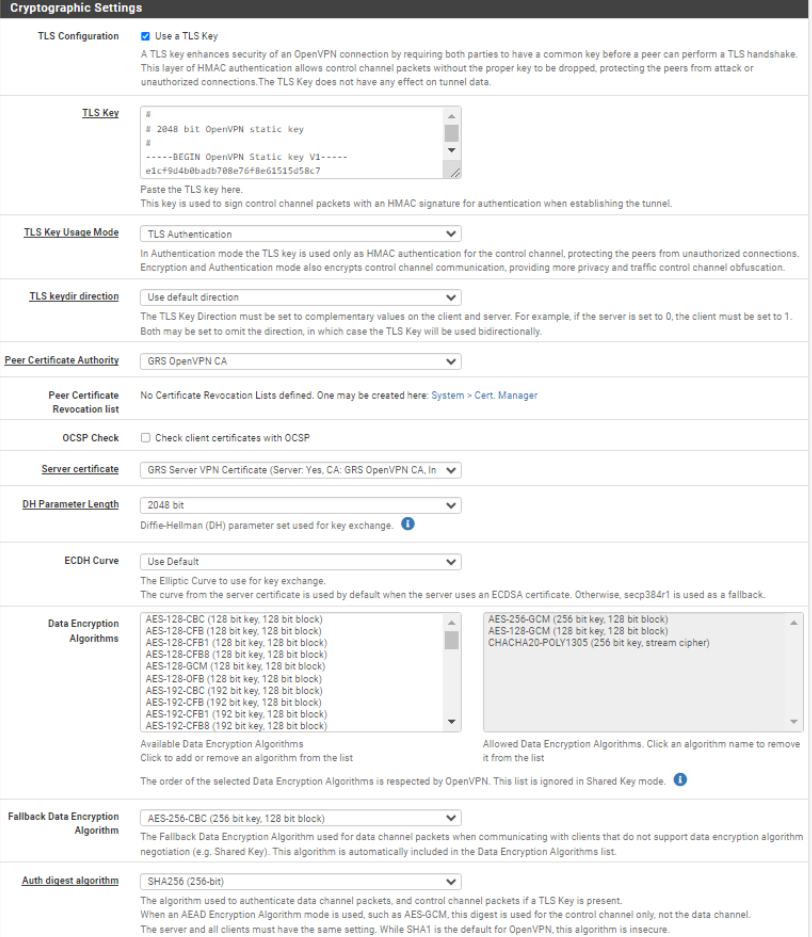
Cryptographic Settings
- Make sure Use a TLS Key and Automatically generate a TLS Key are enabled.
- Make sure your Peer Certificate Authority is set to the CA we created earlier.
- Set the Server Certificate field to the server certificate we created earlier.
- Select 2048 for the DH Parameter Length setting.
- Set the Auth digest algorithm to SHA256 (256-bit)
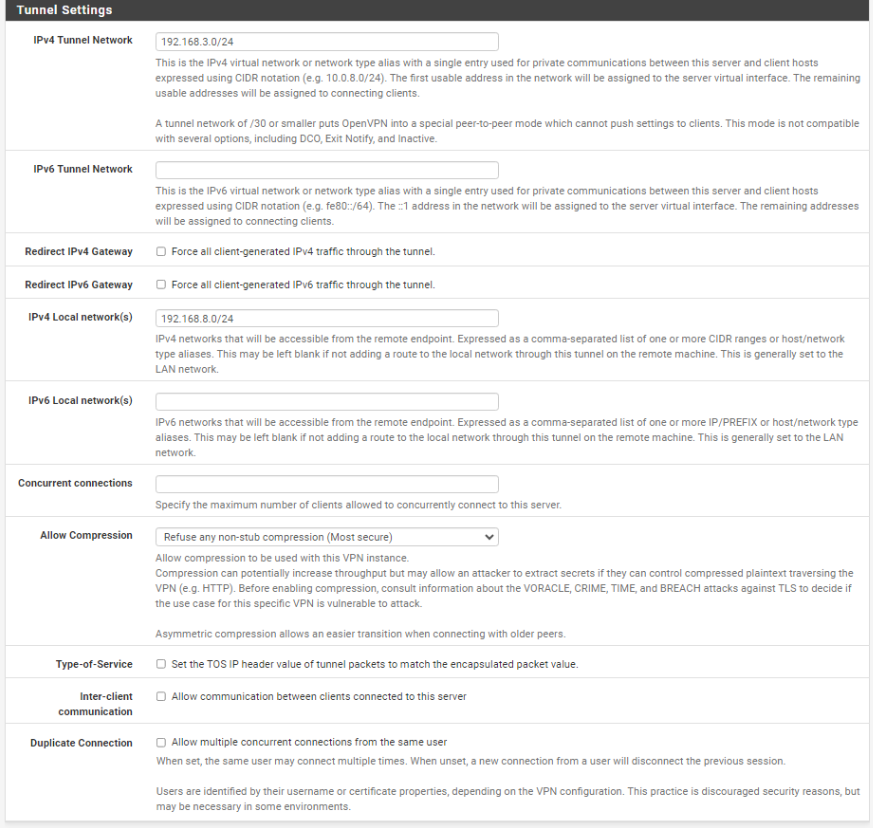
Tunnel Settings
- In the IPv4 Tunnel Network field, enter a subset that is not present on your network to be used as the OpenVPN network's internal subnet. In my case, I'm using 192.168.3.0/24
- If your network also supports IPv6 and you want your OpenVPN tunnel to support IPv6 as well, enter an unused IPv6 subnet in the IPv6 Tunnel Network field. In this example, I am configuring my network for IPv4 only.
- Enable Redirect IPv4 Gateway in order to route all IPv4 traffic over the VPN tunnel. Enable Redirect IPv6 Gateway in order to route all IPv6 traffic over the VPN tunnel, if needed.
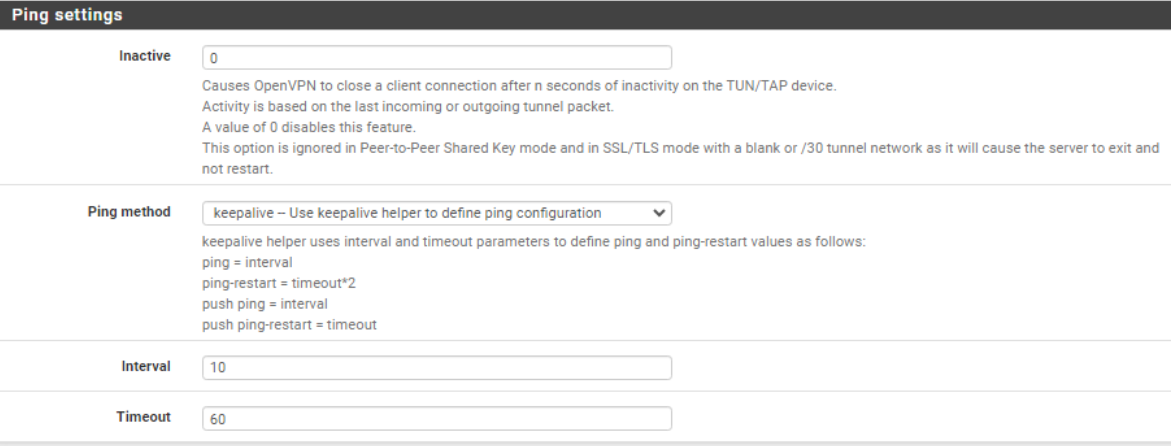
Ping Settings
- Set Inactive n seconds for OpenVPN to disconnect after that seconds. In this example, I set it to 0 to disable the settings.
- Interval and Timeout set for your preferred n seconds.
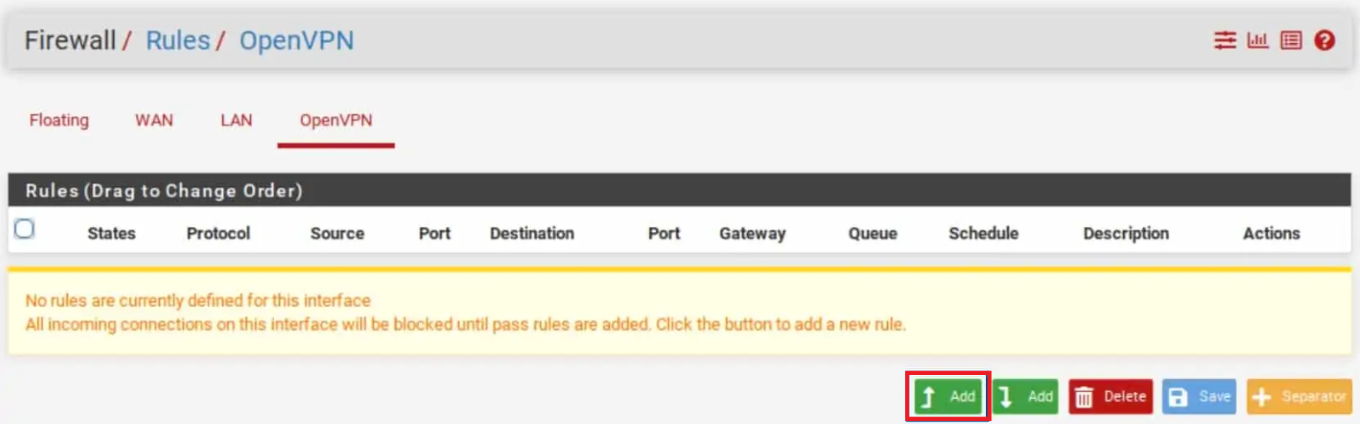
Create firewall rules
Now that our OpenVPN server is configured, we need to create a firewall rule to allow traffic to and from our server.
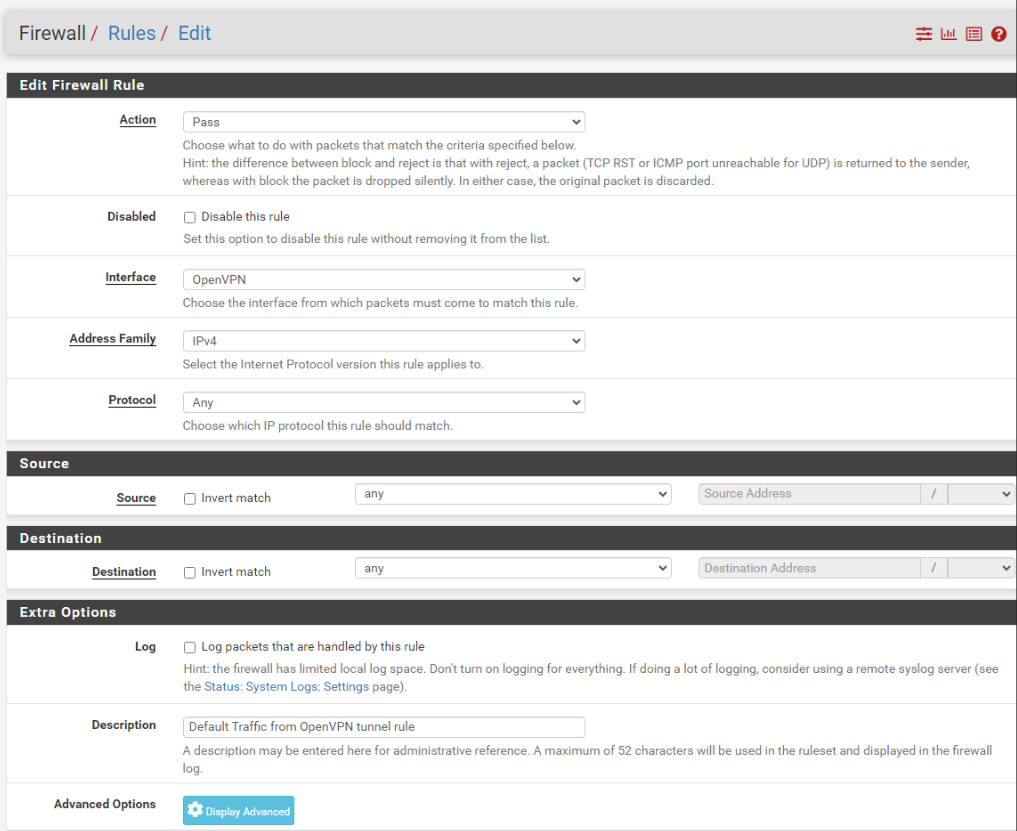
OpenVPN rule
This rule will allow traffic from the OpenVPN subset out to the internet.
- From the menus at the top of the screen, select Firewall > Rules.
- Select the OpenVPN sub-menu.
- Click the Add button to create a new rule at the top of the list.
- Set the Address Family to IPv4 + IPv6 if your system is using both IPv4 and IPv6. If not, leave it at the default value of IPv4.
- Set the Protocol field to Any.
- Set the Source to Network.
- Enter a description for this rule in the Description field.
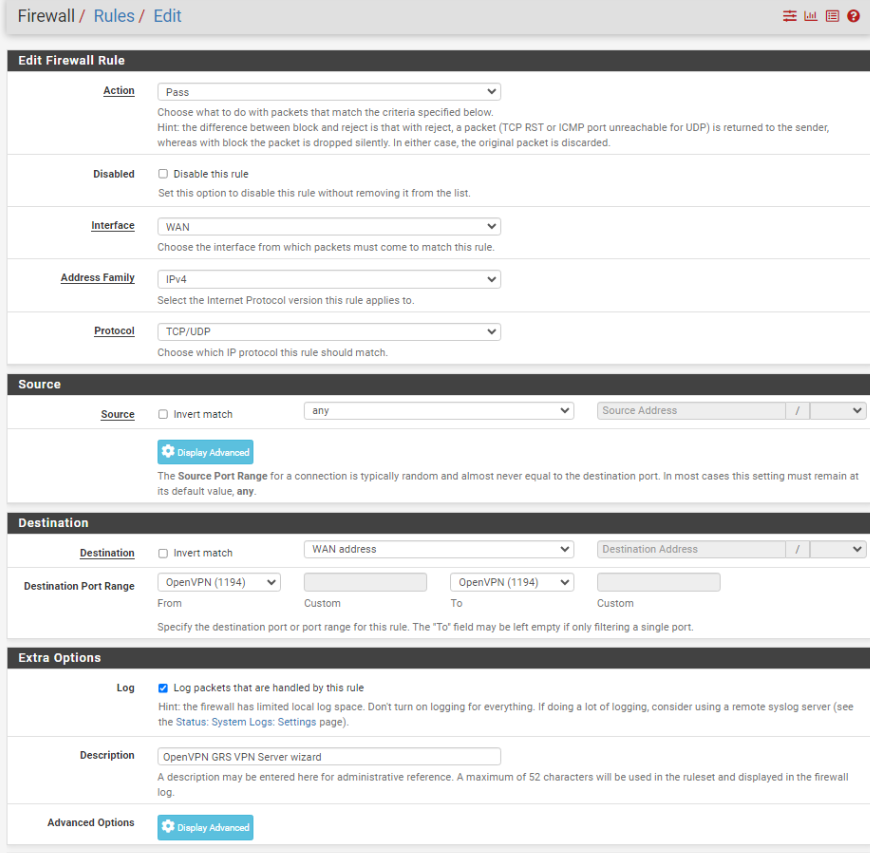
WAN rule
In order to connect your OpenVPN server from the outside world (i.e., the internet), you're going to need to open the port your server runs on (1194, in this example) on your WAN interface. This rule will allow your client to connect to your OpenVPN server from the internet.
- From the menus at the top of the screen, select Firewall > Rules.
- Select the WAN sub-menu (the default).
- Click the Add button to create a new rule at the top of the list.
- Set the Address Family to IPv4+IPv6 if your system is using both IPv4 and IPv6. If not, leave it at the default value of IPv4.
- Make sure Source is set to Any.
- Set the Protocol field to UDP.
- Set the Destination Port Range to 1194.
- Enter a description for this rule in the Description field.
Install the OpenVPN Client Export Utility
In order to easily configure our OpenVPN client, pfSense provides an automated configuration generator for OpenVPN. However, it's not installed by default. We need to install the package from the pfSense Package Manager manually.
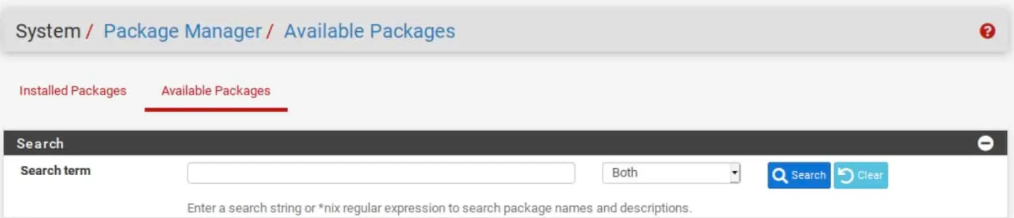
- From the menus at the top of the screen, select System > Package Manager. You are taken to the Package Manager.
- Select the Available Packages sub-menu.
- Scroll down until you see
openvpn-client-exportand click the Install button to its right. You are taken to the Package Installer page.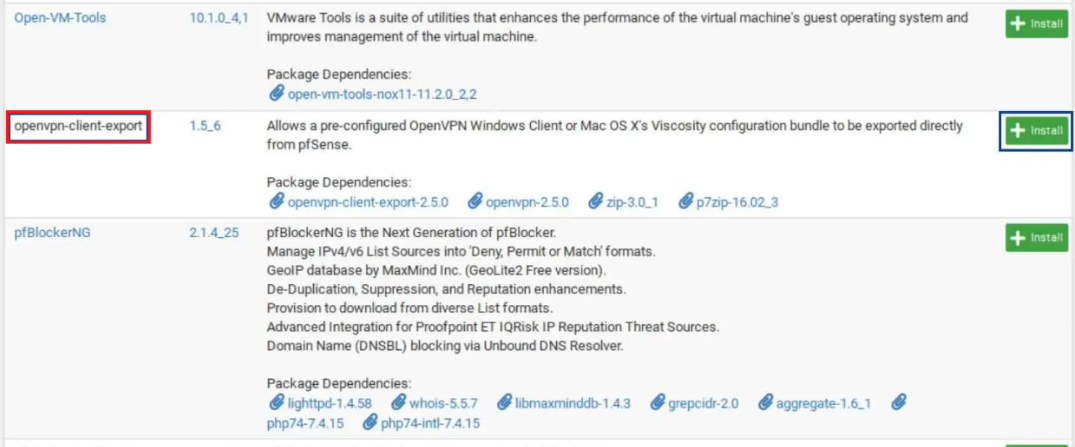
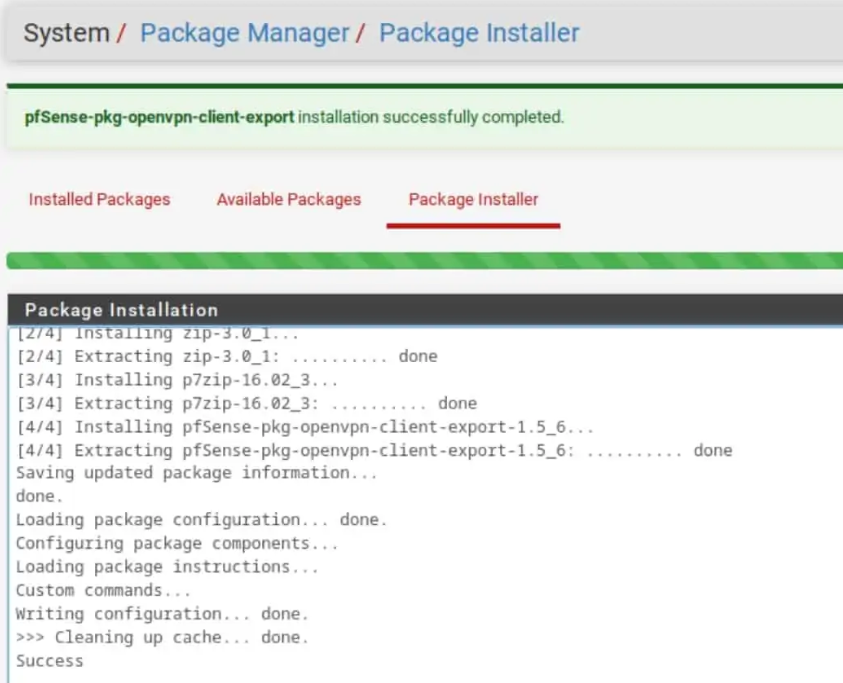
- Click Confirm. The installation begins.
- Once the installation is finished, the progress bar turns green, and you should see Success displayed in the package installation window.
Creating User Certificate for the GreenRADIUS User
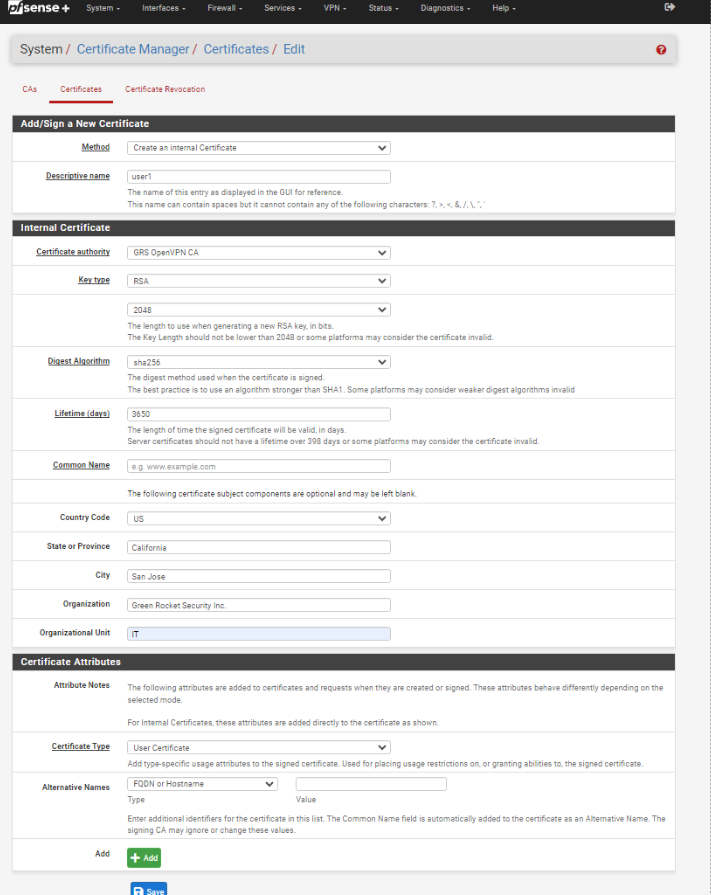
- Go to System > Certificate Manager > Certificate tabs. Add new.
- Method should be Create an Internal Certificate
- Select the CA created earlier for the OpenVPN in Certificate Authority then other fields will auto-populate.
- Make sure User Certificate is selected in Certificate Type.
Export the OpenVPN Client Configuration
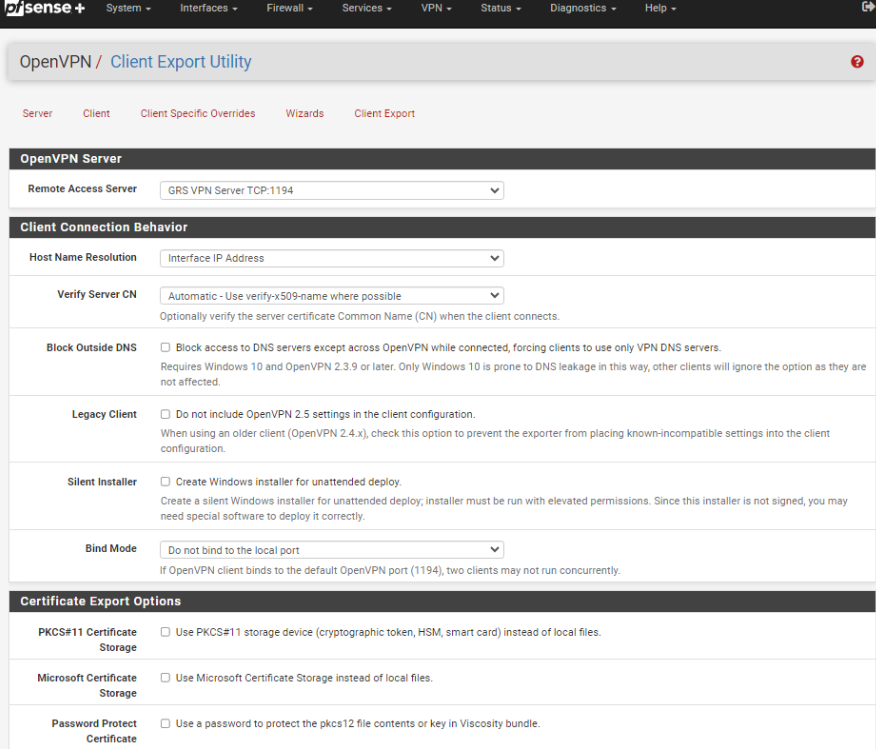
- From the menus at the top of the screen, select VPN > OpenVPN
- Select the Client Export sub-menu.
- Make sure the correct OpenVPN server is selected next to Remote Access Server.
- If you're using Dynamic DNS to access your pfSense WAN, select Other from the "Host Name Resolution" drop-down menu. Then enter the hostname in the "Host Name" box that appears below. This allows you to access your pfSense WAN by hostname rather than by IP address, which means you won't lose access to your OpenVPN server if your ISP changes your WAN IP address. If you're not using Dynamic DNS, leave "Host Name Resolution" set to "Interface IP Address."
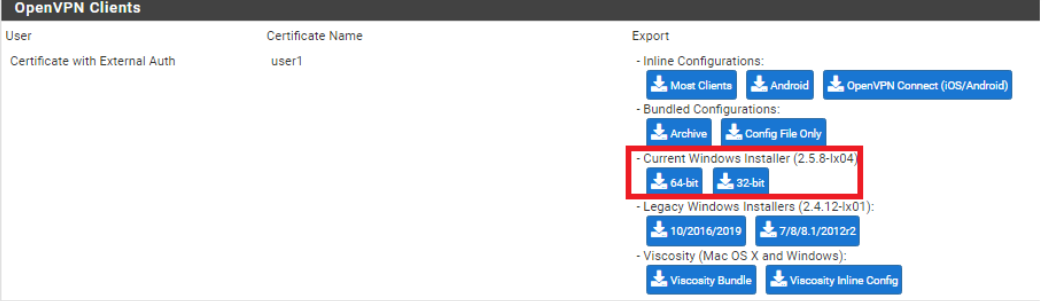
- Scroll down to the bottom of the page, and you'll find generated configurations for various systems and apps. Select the user certificate created earlier that matches to the GreenRADIUS user; in this example I used
user1. Click on the appropriate configuration for your device(s) to download it to your computer.
Once the installer is downloaded, install it to the machine to test.
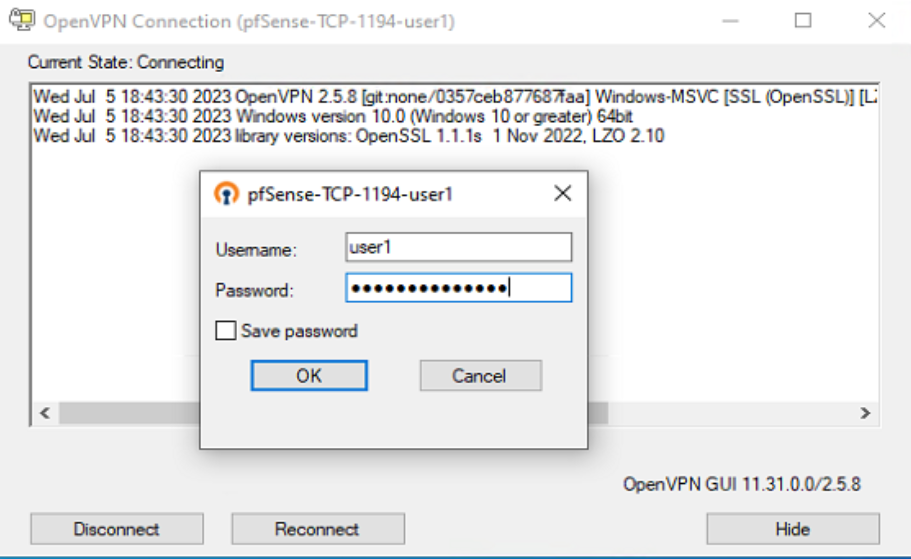
Authentication Testing in OpenVPN
- Type in the Username and Password + GRS OTP to the field and log in.
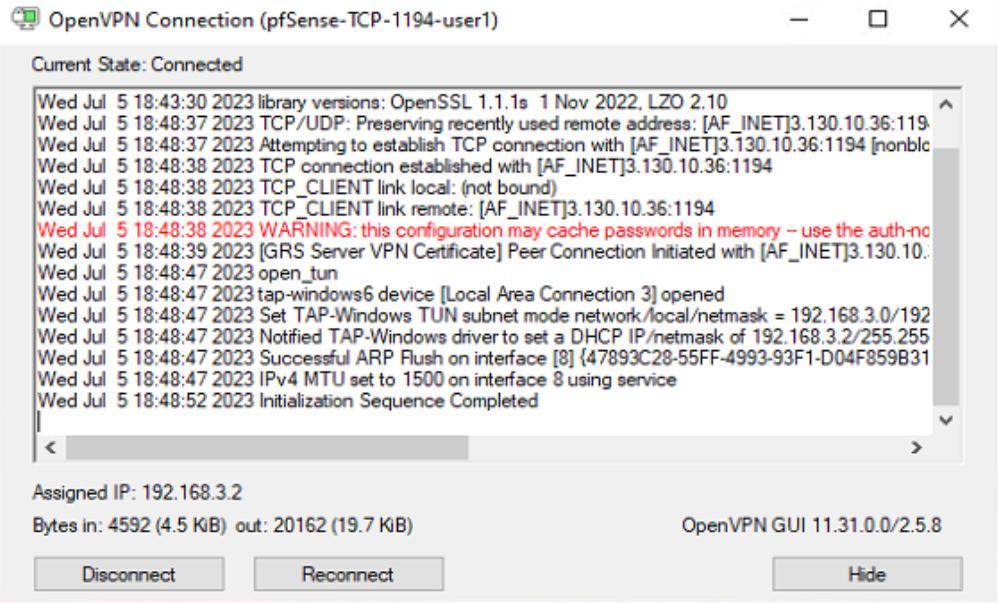
- Showing OpenVPN status as connected.
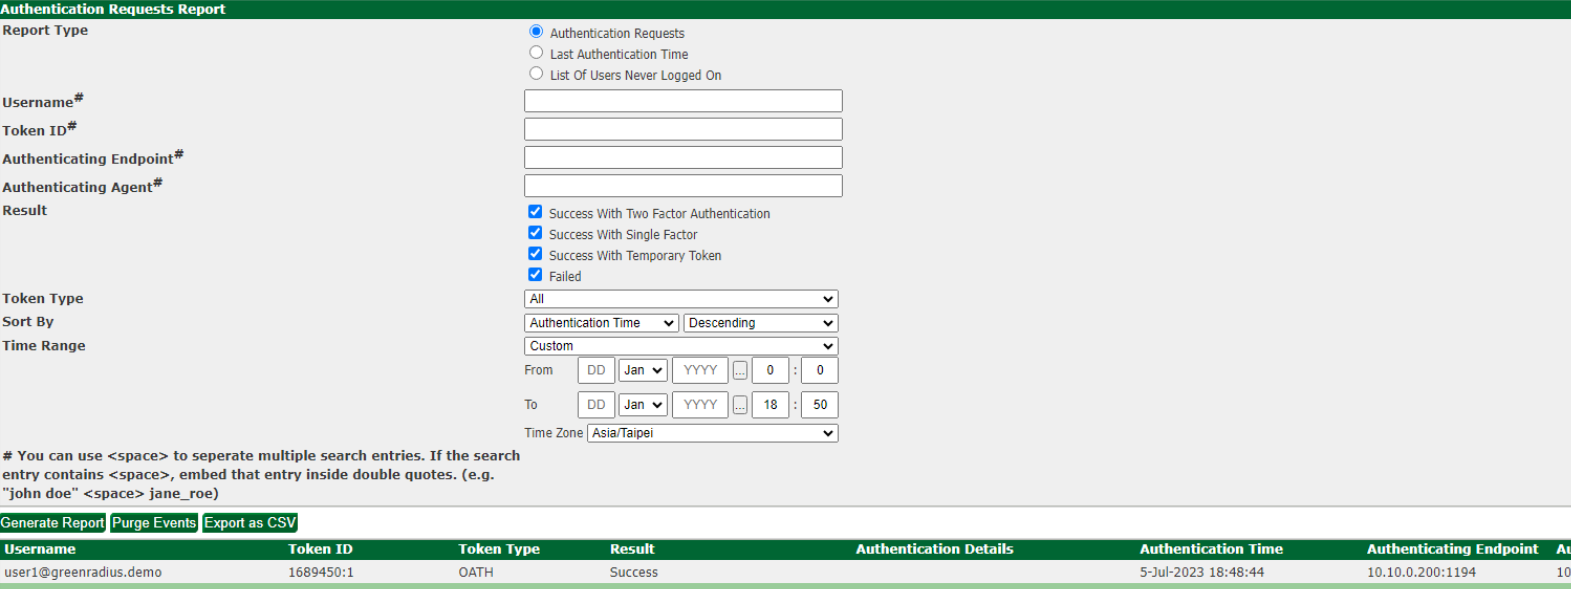
- Go to GreenRADIUS server and check Authentication Reports to confirm sign-in
© 2026 Green Rocket Security Inc. All rights reserved.