Integration Guide for Check Point VPN
Before starting, make sure GreenRADIUS is configured with users imported from your LDAP and can communicate with your Check Point VPN
Configuring GreenRADIUS for Check Point VPN
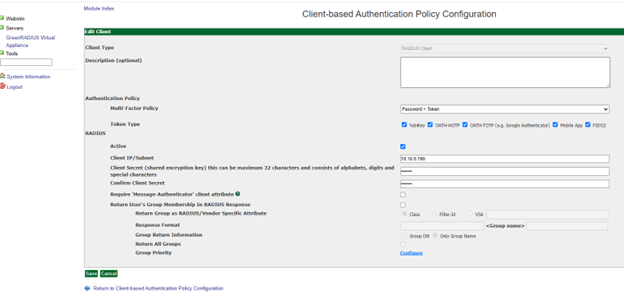
In the GreenRADIUS web admin interface, add the Check Point VPN as a RADIUS client.
- Click the Global Configuration tab
- Click the Client-based Authentication Policies icon
- Enter the IP address of the Check Point VPN. Then enter the same RADIUS secret twice. Then click the Add button.
Configuring the Check Point VPN
Add GreenRADIUS as a RADIUS Server
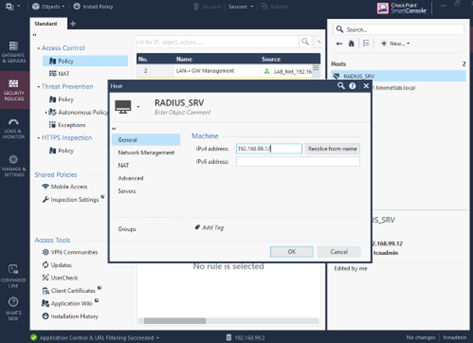
- Log in to the Check Point VPN SmartConsole
- Go to Objects > New Host to add GreenRADIUS details
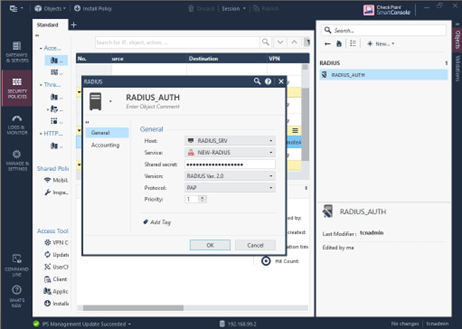
- Go to Objects > More object types > Server > RADIUS. Select the newly created GreenRADIUS host and enter GreenRADIUS details. (Note: Select "PAP" as the protocol.)
Create Local Users in the Check Point VPN
If you would like to create local user accounts and have them authenticated by GreenRADIUS, follow the steps below. (If you would like to use user accounts from Active Directory, please follow the steps in the next section below.)
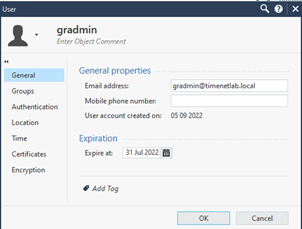
- Go to Objects > More object types > User/Identity > New User
- Create new users making sure that their usernames match exactly with their usernames in your LDAP and in GreenRADIUS (assuming they have already been imported into GreenRADIUS)
Import Users from Active Directory into the Check Point VPN
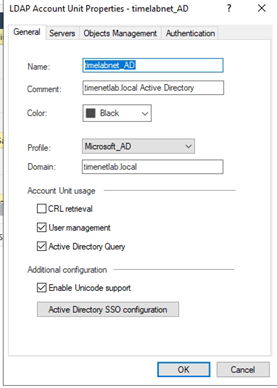
- Go to Objects > More object types > User/Identity > LDAP Account Unit
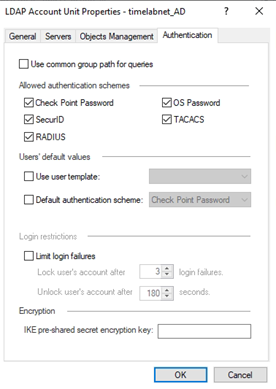
- Specify all of the required details for the Active Directory connection. On the General tab, provide a name for the LDAP.
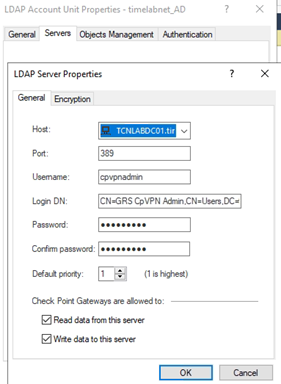
- On the Servers tab, enter the Active Directory details
- On the Objects Management tab, click "Fetch branches" to confirm it can access the domains in the Active Directory

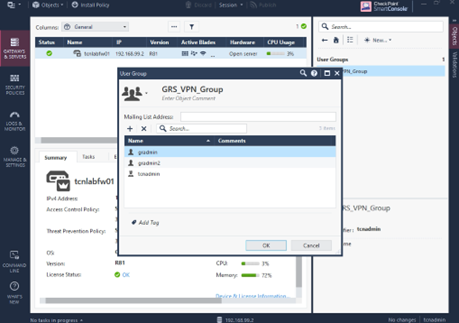
Create Group in the Check Point VPN
For local user accounts, go to Objects > More object types > User/Identity > New Group, and assign users to this group
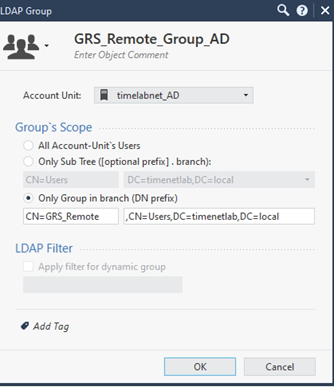
For Active Directory user accounts, go to Objects > More object types > User/Identity > LDAP Group. Specify the AD security group whose members should be allowed access.
Configure Gateway
- Navigate to Gateways & Servers and double click on your gateway
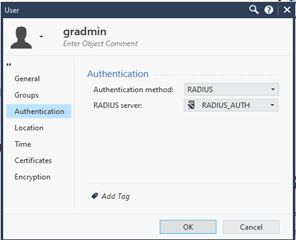
- Go to VPN Client > Authentication > Authentication Method and click the Settings button
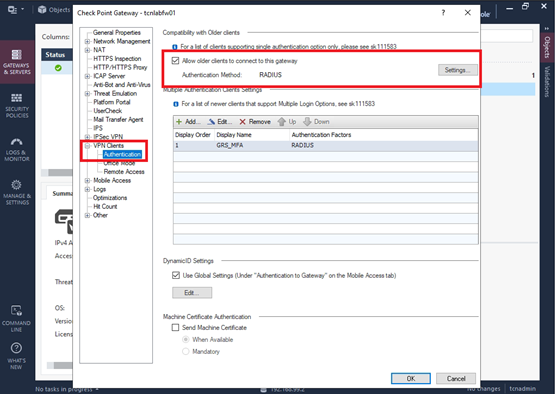
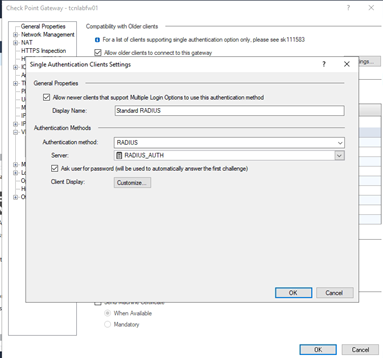
- In the Single Authentication Client Settings, set Authentication Method as RADIUS and specify the configured RADIUS server
Configure Security Policies
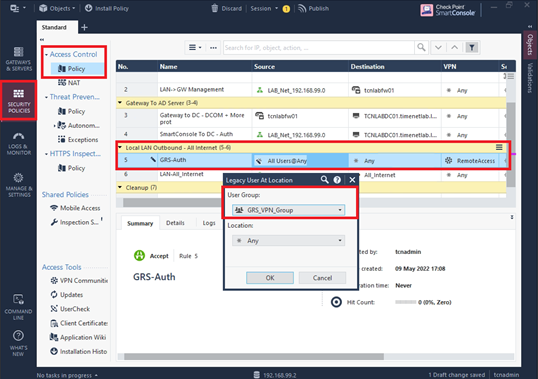
- Go to Security Policies > Access Control > Policy
- Click "+" to add a policy
- For local user accounts, right click the Source field and select Add Legacy User Access. Select the group in the User Group dropdown menu.
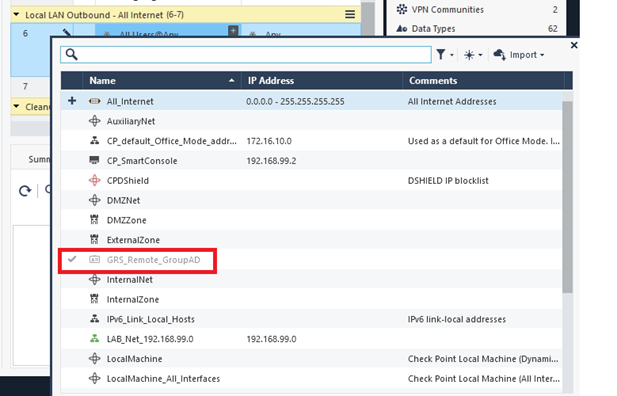
- For user accounts from Active Directory, in the Source field, click the "+" (add) icon and select the AD group created earlier
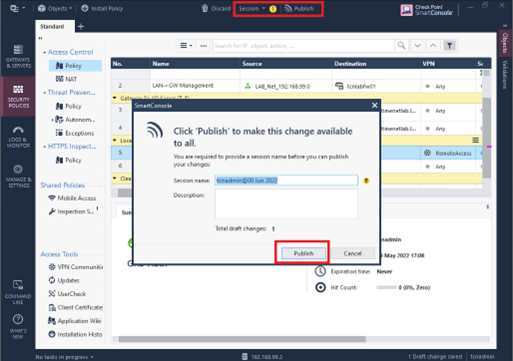
Once all of this has been configured, publish to save the settings
Test Login
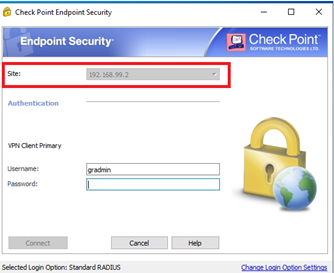
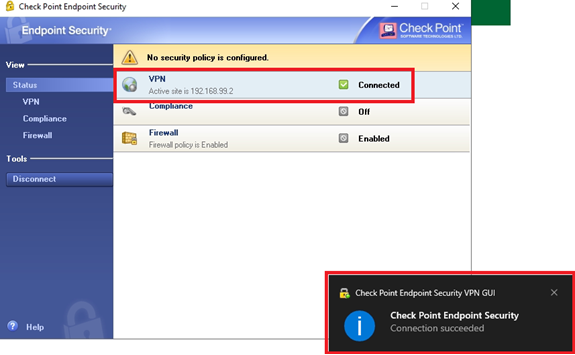
- To test a VPN login, launch your Check Point Endpoint Security VPN client
- Select the appropriate site
- Log in with your username and password+OTP. (If you are testing with a YubiKey or Authenticator app OTP, and the OTP Input Method is "Append OTP to password" in GreenRADIUS, then append the OTP to the end of your password in the password field.)
- If the login is successful, it will show that it is connected
- You can verify that the login was authenticated by GreenRADIUS by going to the GreenRADIUS web admin interface > Reports tab > Authentication Requests report
© 2026 Green Rocket Security Inc. All rights reserved.