Integration Guide for FortiGate VPN
Before starting, make sure GreenRADIUS is configured with users imported from your LDAP and can communicate with your FortiGate
Configuring GreenRADIUS for FortiGate VPN
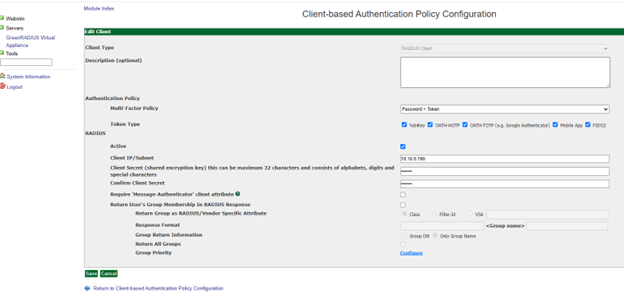
In the GreenRADIUS web admin interface, add the FortiGate VPN as a RADIUS client.
- Click the Global Configuration tab
- Click the Client-based Authentication Policies icon
- Enter the IP address of the FortiGate. Then enter the same RADIUS secret twice. Then click the Add button.
Configuring the FortiGate VPN
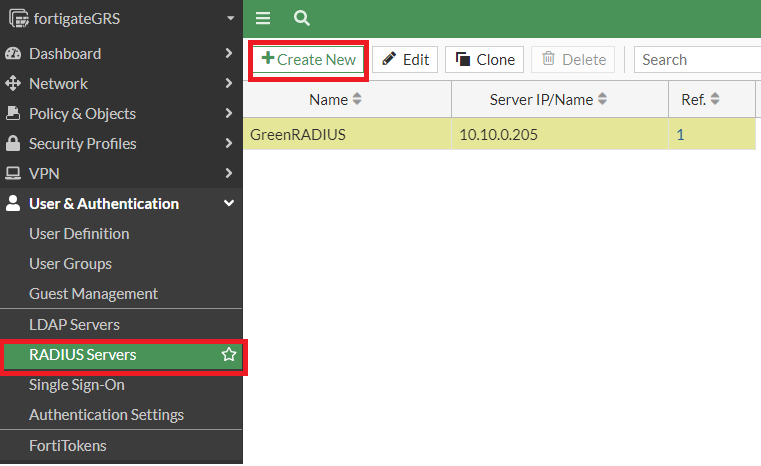
Add GreenRADIUS as a RADIUS Server
- Log in to FortiGate
- Open the User & Authentication menu, select RADIUS Servers, and click the "+ Create New" button
-
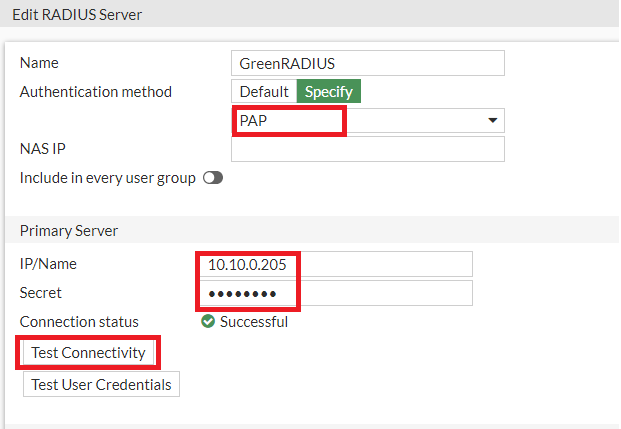
Configure the following fields
- Name: GreenRADIUS
- Authentication method: Specify PAP
- Primary Server IP/Name: [the IP address of GreenRADIUS]
- Primary Server Secret: [the same RADIUS secret configured in GreenRADIUS for the FortiGate RADIUS client]
-
Use the Test Connectivity and Test User Credentials buttons to verify the above settings
-
Click OK
Create a user group
- From the User & Authentication menu, select User Groups, and click the "+ Create New" button
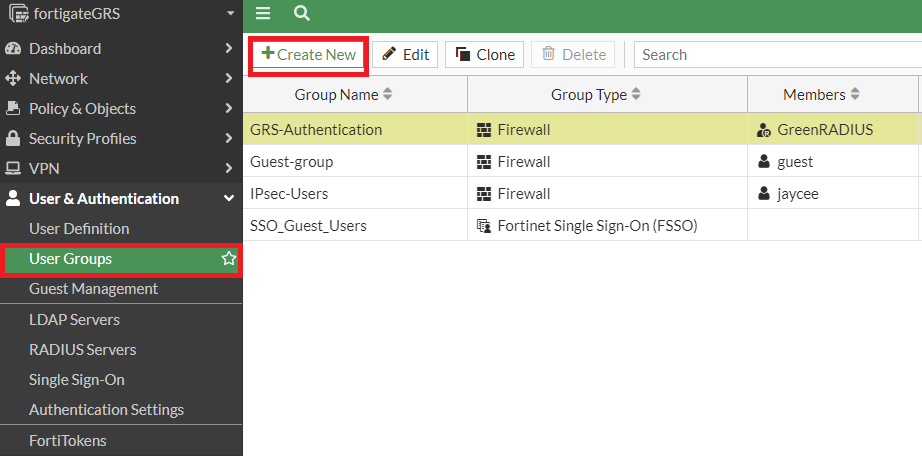
- Configure the following fields:
- Name: [as desired, for example, "GRS Authentication"]
- Type: Firewall
- Members: [leave this field empty]
- Remote Groups: Click the "+ Add" button, set Remote Server as "GreenRADIUS" and Groups as "Any"

- Click OK
- The new user group should now be listed

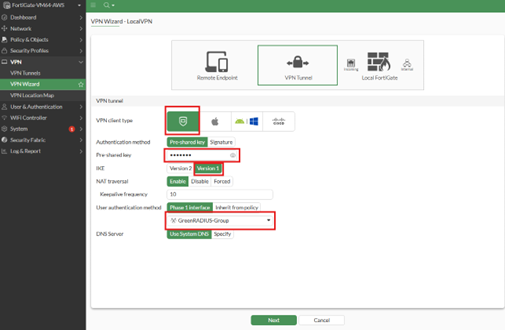
IPsec VPN Configuration
- From the VPN menu, select VPN Wizard Set "Tunnel name" and select template "Remote Access" and then click Begin

- Configure the following fields:
- VPN Client Type: FortiClient
- Pre-shared key: [This is a credential for the VPN and should differ from any user password]
- IKE: Version 1
- User authentication method group: [select the one created above]
- Click Next
- Configure the following fields:
- Addresses to assign to connected endpoints: [as desired]
- Subnet for connected endpoints: [as per your network settings]
- Click Next
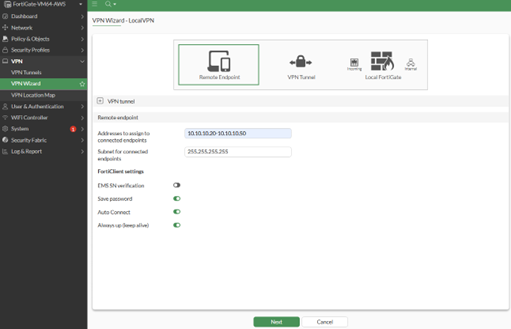
- In the FortiClient settings, set as desired, however, we recommend not saving passwords, especially if OTPs will be used as the second factor.
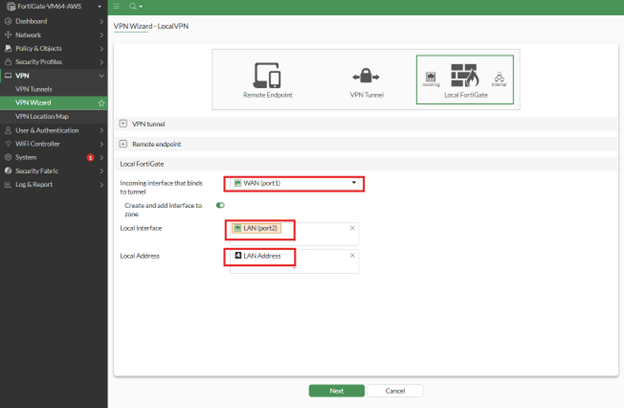
- Configure the following fields:
- Incoming interface that binds to tunnel: [Firewall WAN]
- Local Interface: [LAN interface of your network]
- Local Address: [the local network address]
- Click Next
- Review the configuration, then Submit

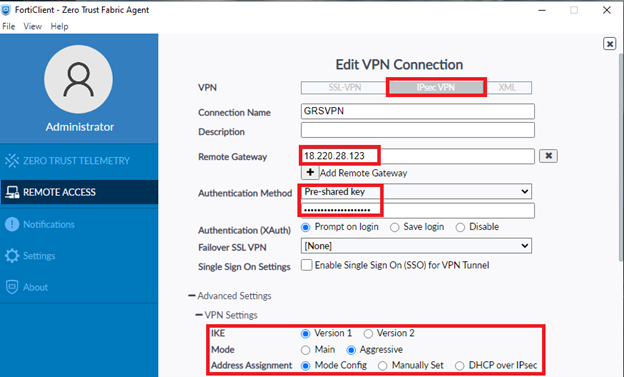
- The IPsec integration with GreenRADIUS is now complete. In the FortiClient, the required settings are:
- VPN: IPsec VPN
- Remote Gateway: IP address or hostname of your FortiGate
- Authentication Method: Pre-shared key, and enter the key configured above
- VPN Settings: [Please make sure that it matches the information in the Firewall configuration]
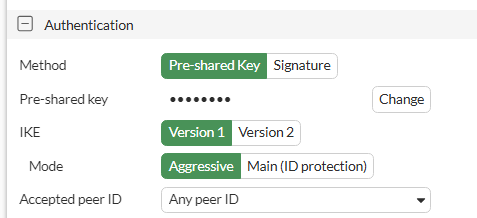
(Above) FortiClient end settings
(Above) Firewall end settings
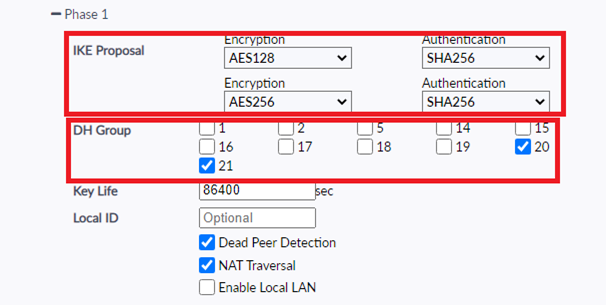
(Above) Phase 1 proposal FortiClient end settings
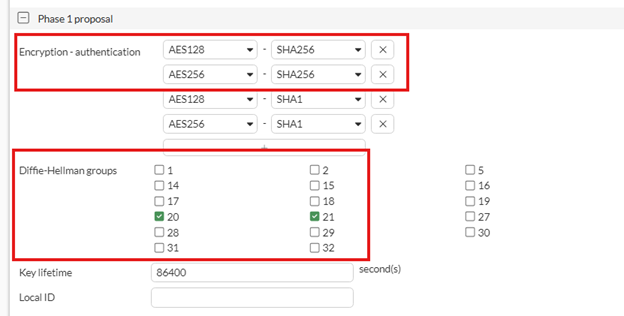
(Above) Phase 1 proposal Firewall end settings
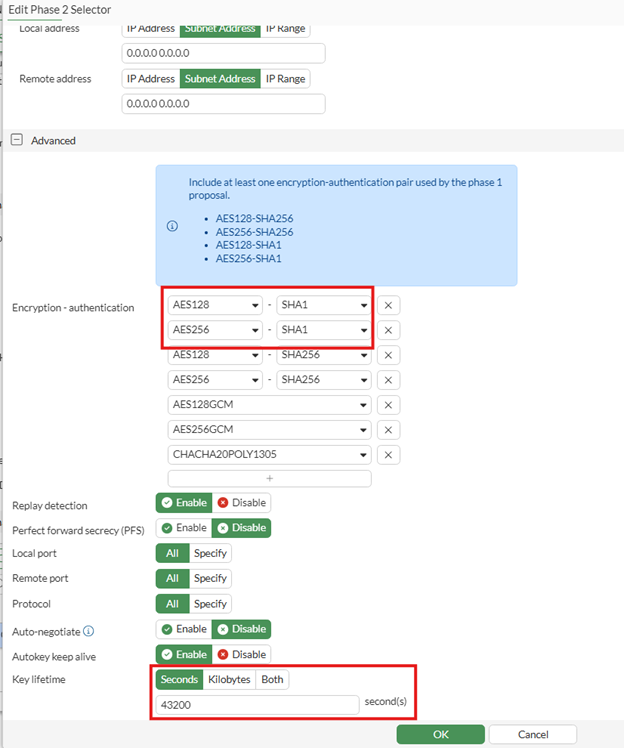
(Above) Phase 2 selector Firewall end settings
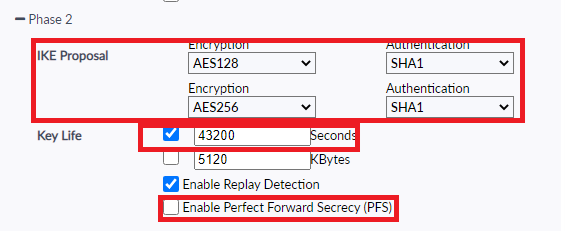
(Above) Phase 2 FortiClient end settings
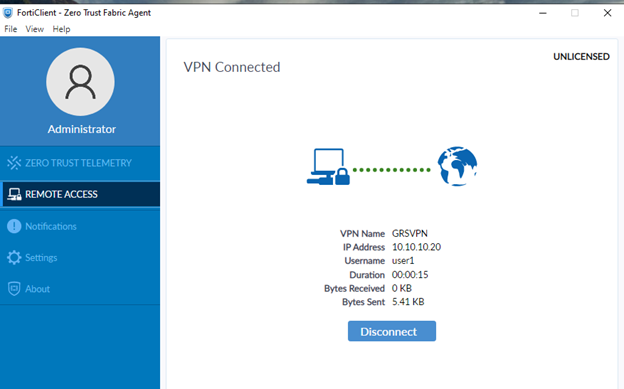
- Try a login on the FortiClient
SSL VPN Configuration
Note: The same group configured above can be used
- From the VPN menu, select SSL-VPN Settings
- Configure the following fields:
- Enable SSL VPN: Yes (green)
- Listen on Interface(s): [as desired, for example, WAN]
- Listen on Port: [as desired, for example, 10443]
- Server Certificate: [If you have a server certificate, set it to the authentication certificate]
- Under Authentication/Portal Mapping:
- Edit "All Other Users/Groups" and set the Portal to "full-access"
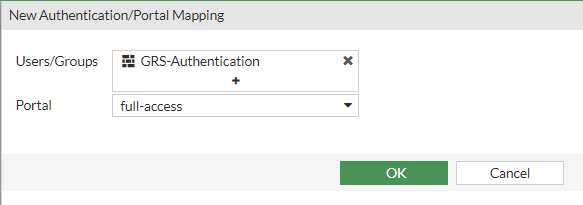
- Click "+ Create New" and create a mapping for the desired user group, setting the Portal to "full-access"
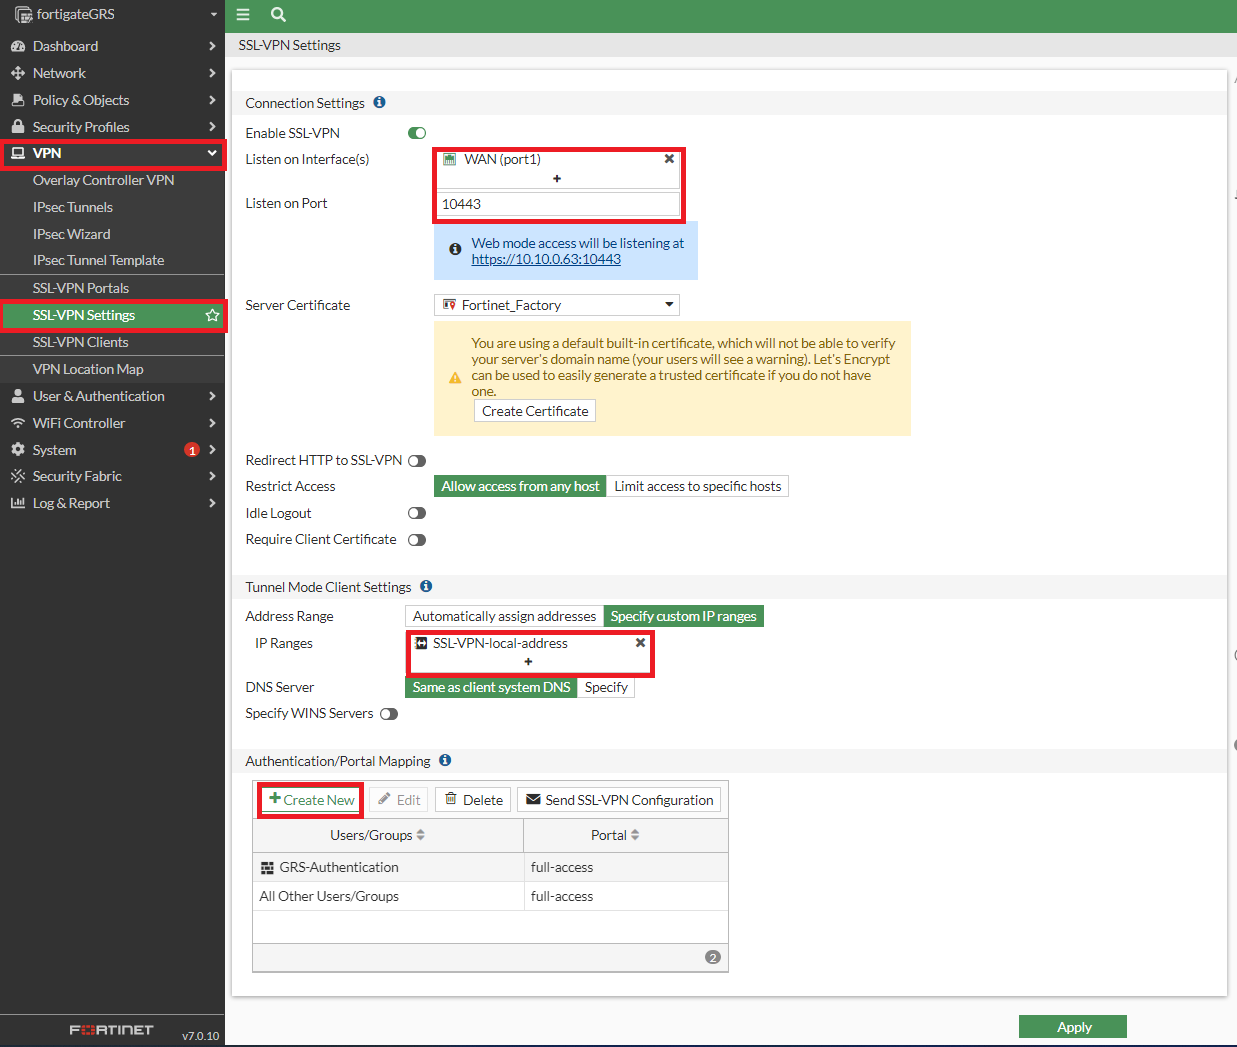
- Click Apply
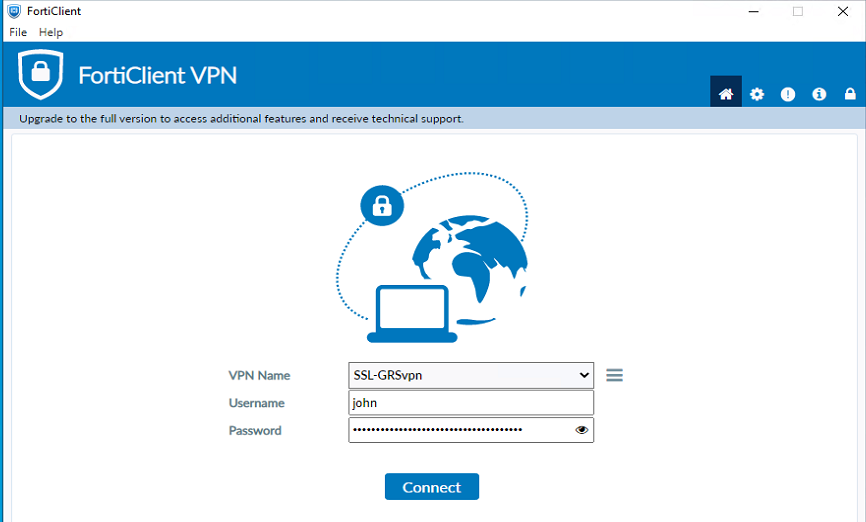
- On the FortiClient, configure the required details below:
- VPN: SSL VPN
- Remote Gateway: [IP address or hostname of your FortiGate]
- Customize port: [the port configured above]
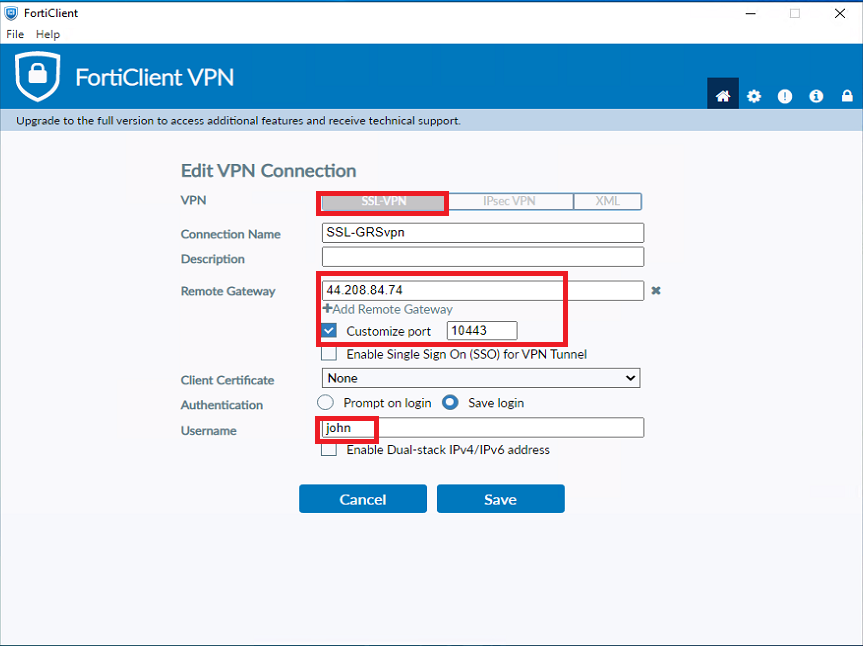
- Try a login on the FortiClient
Updated 2025-07-10
© 2026 Green Rocket Security Inc. All rights reserved.
© 2026 Green Rocket Security Inc. All rights reserved.